手机摄影技巧系列(七):黑白摄影后期技巧
继上一篇 《手机摄影技巧系列(五):遇见色彩工具》 之后,今天带来手机摄影技巧系列文章的第七篇,关于黑白照片后期的内容。
大概在我几岁的时候,我们家还是一台黑白电视机。后来,第一次看到彩色电视的时候,完全着迷了。摄影技术也历经了黑白到彩色的转变,是一次划时代的更迭。但是,大多数事物在发展过程中都不可能完全被否定。纵使当代摄影是以彩色为主,黑白摄影以其强大的感染力和艺术表现力仍牢牢的占据着一席之地。
这篇文章中,原作者从 Darkroom 的后期操作入手,介绍了关于手机黑白摄影(后期)的一些技巧和方法。希望能带给准备尝试手机黑白摄影的读者们一些帮助。
本文原作者 Majd Taby 是摄影后期应用 Darkroom 公司的图像设计工程师,曾就职过 Instagram、Facebook 和 Apple 等公司。本文已经由原作者授权编译。
- 为了更好的理解,编者对原文内容进行了适当的演绎。
I’ve been excited about this one for a couple of months, ever since we finalized work on the Color Tool which recently launched with Darkroom 2. With Tone and Color, Black and White editing is now supercharged in Darkroom.
自从我们在 Darkroom 上面推出色彩工具之后,心情久久不能平静。如今,当你使用 Darkroom 对照片的色彩,色调进行调整或者想要实现黑白效果,这些都已经有了巨大的改变。
Black and White photos are a category of photos all on their own and can evoke very powerful emotional responses and elevate a photograph when done well. Mastering it puts yet another tool in your photography tool belt.
黑白照片是摄影中的一个重要分类,因其强烈的表现力和艺术张力深受摄影师们的喜爱。学会黑白摄影的技巧和方法也是自我摄影水平的具体体现,同时相当于掌握了一项重要的摄影本领。
Black and White photography is particularly powerful for a couple of reasons. From a technical perspective, by reducing one of the variables in the photo (color), you eliminate an entire category of potential pitfalls and mistakes, and can focus on the value (used here in the artistic sense of “Amount of lightness and darkness”) and learn how to see and judge the value of a scene before you even take a photo. This “photographer’s eye” — An ability to imagine what the photograph will look like — is a fundamental skill.
黑白摄影所具有的强烈感染力主要源自一下几个方面。从技术的角度来讲,减少照片中的一个变量(这里指照片的色彩),就可以很好的避免掉入一个潜在的陷阱,使拍摄者更专注于照片某一方面的价值(这里指黑白照片所具备的光线艺术感)。学会如何在拍摄一张照片时寻找和判断画面对于自己的价值是很重要的,摄影师的眼睛都具备一项基本的能力,那就是想象自己拍摄的画面呈现在照片上的样子。
From a more artistic sense, when you remove color from a photo, you divorce it from reality, and allow the user to project into the photo. When the photograph loses color, it becomes a representation of what the photographer was seeing, and not a documentation of the scene. This is one of the reasons why B&W movies from the pre-Technicolor days look so romantic to us.
从艺术家的观点出发,当你将一张照片做褪色处理后,就是将其从真实场景中剥离出来,使得观赏者更好地投入其中。当照片变成黑白之后,照片所表达的就不单单是客观存在的事物,而是摄影师眼中的场景。这也是彩色电影之前的黑白影片在如今看起来让我们觉得浪漫和有艺术观感的一个重要原因。
There are two large topics that can be discussed when it comes to Black and White Photography: The technicalities of working in Black and White, and the artistic choices to make and how they influence the photo. The latter is a much broader topic that hinges on personal style and tastes. We may get into it in a future post, or multiple posts, by profiling individual photographers and their personal styles. This article will focus on the atechnicalities of working with Black and White photos in Darkroom.
黑白摄影中最需要关注的两大主题分别是:实现黑白效果的客观技术问题以及艺术家们赋予其中的主观情感。至于第二个主题是一个非常宽泛的话题,关系到个人的风格和喜好。关于独立摄影师的风格,或许得通过一篇或多篇文章才能准确剖析。今天的这篇文章中,我们重点关注的是黑白摄影的第一个主题,那就是实现美好的黑白效果。一切都是以 Darkroom 为基础展开的。
Ok, let’s get into it: Drag that Saturation slider all the way to the left and make that photo black and white.
好吧,接下来选择一张照片,将饱和度滑块拖动到最左边实现黑白的效果。
对比度
In our two-part Using Curves posts, we discussed how the RGB curve can be used to selectively add and remove contrast the various tonal ranges of the photo. The image being Black and White, you don’t have to worry about impact on saturation when editing the curve. Feel free to experiment here, you have more lattitude to make adjustments.
在之前关于曲线工具的两篇文章(第一篇|第二篇)中。我们介绍了如何通过调节 RGB 曲线有选择性的改变照片不同色域的对比度。当你在编辑黑白照片的时候,你完全不需要担心曲线的改变对照片饱和度的影响,可以有更大的调节自由。
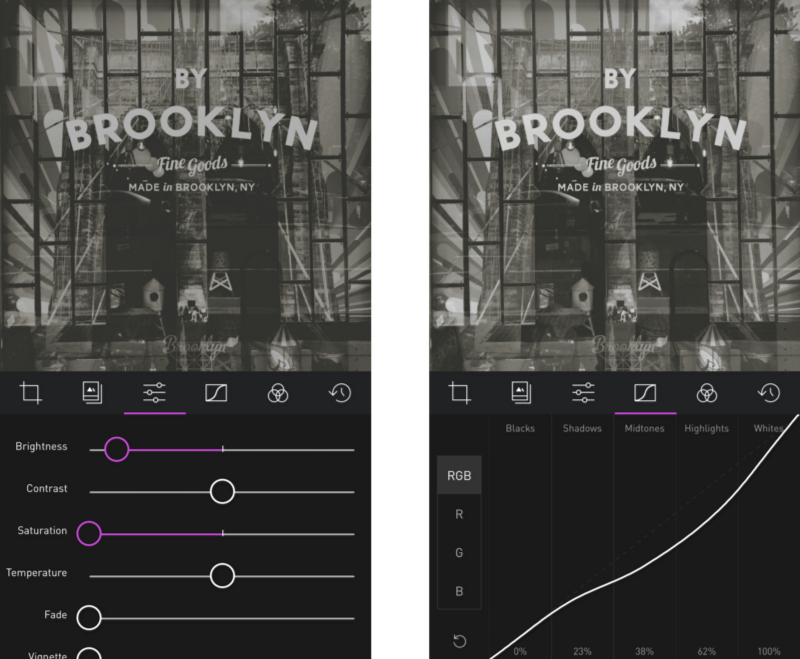
In the aforementioned two part series on Using Curves, we discussed the difference between using the Contrast slider and the RGB Curve. Much of that applies here. Namely: The Contrast slider is a global predefined adjustment, whereas the RGB Curve allows you to selectively apply contrast to different parts of the image by forming your own S-curve with its own steepness and it’s own steepest-point. The same applies to Brightness. Here’s an example of how the Brightness tool crushes the shadows, while the selective RGB Curve adjustment maintained the information.
前面两篇关于曲线工具使用的文章(第一篇|第二篇)中,我们也讨论了使用对比度选项和 RGB 曲线的不同之处。对比度滑块通常针对整个画面的调节,而 RGB 曲线允许你单独调节画面中某一特定区域的对比度。同样的情况也适用于亮度调节的时候。下面有一个例子就是两种不同调节方式对于阴影部分的修缮效果。可以看出使用 RGB 曲线工具保留了更多阴影部分的细节。
亮度
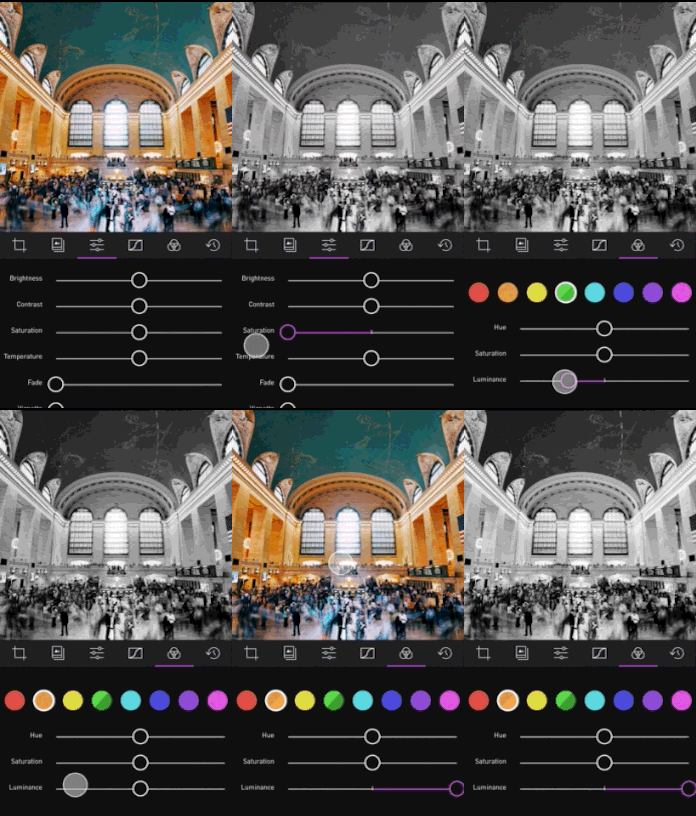
This section carries on the chat about contrast, but it’s pretty fun to play around with and it’s new in Darkroom 2, so it felt like it needed its own section. The Color tool includes one of my favorite hidden power-user features in Darkroom 2: The ability to edit the luminance of color channels in Black and White Photos. This takes a bit of explanation. The order in which a photo editor applies the edits is very important in really taking advantage of the tool. For example, if the Color tool was applied after Saturation, then the Color tool won’t be able to differentiate between the various colors. However, the Color Tool in Darkroom 2 is applied before the Saturation tool, which means you can use it to adjust the Luminance of individual color in a black and white photo. Here’s a gif of it working:
这个部分紧接着上面讨论对比度的话题。自从 Darkroom 2 更新以来,增添了更多有趣的玩法。曲线工具中就包含了我特别喜欢的一个隐藏特性:调节黑白照片的亮度。详细解释一下,色彩编辑器中的每个工具的排列顺序是经过深思熟虑之后的结果。举例而言,如果将色彩工具放在饱和度工具的后面,那么色彩工具就丧失了控制颜色的能力。在 Darkroom 2 中,我们将色彩工具放在了饱和工具的前面,这就意味着你可以使用色彩工具来调节黑白照片中独立颜色的亮度。这里有一个动图演示:
When I recently asked on Twitter about what you guys wanted to know about Black and White editing, color and tone were the two standout requests. It may sound weird to talk about color in a “Black and White Editing” post, but it’s actually very powerful to add color after fully desaturating the photo. By desaturating the photo, all the colors get flattened to a gray color, which means adding color back up adds the color evenly across the entire tone range. There are multiple ways of adding color to your photo. The easiest way is to use the Temperature slider to add a blue/yellow hue to the photo.
当我最近一次在 Twiiter 上面问大家关于黑白编辑有什么想法时,与色彩和色调相关的回复比较多。在黑白摄影的文章中讨论色彩的问题可能听起来本身就比较奇怪,但事实上向完全褪色了的照片中增添一些色调很多时候也是很有必要的。通过使照片褪色,所有的色彩都变成了灰色,意味着当你改变色调时会影响到整个画面。有几种方法可以用来改变黑白照片的整体色调,其中最简单的就是通过色温工具向照片中增添蓝色调或者黄色调。
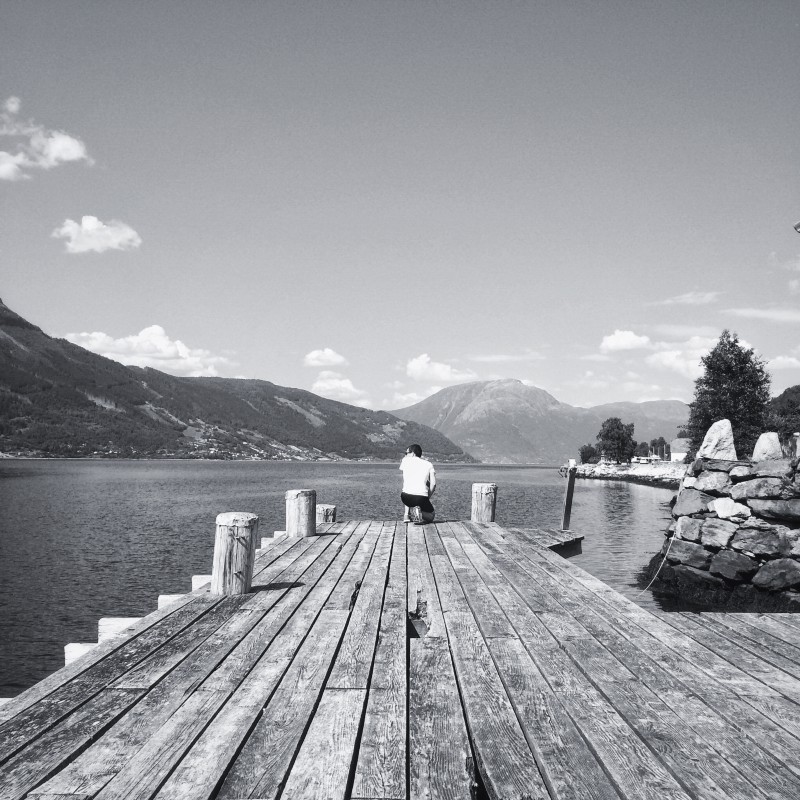
单纯的进行色温调节对画面的整体色调影响是有限的,这也就赋予了色调工具用武之地。
色调工具
Also new in Darkroom 2 is the new Tone tool (Part of the Pro Kit In-App Purchase). Now, you’re no longer constrained to just Blue/Yellow hues with the temperature slider. you can pick any color on the entire color spectrum, and a different color for the highlights and for the shadows. This is also known as Split Toning (splitting the tone between highlights and shadows). You don’t need to desaturate the image to make use of it, but the two work really well together. A very traditional split tone is using yellows for the highlights, and blue for the shadows.
Darkroom 中提供了全新的色调工具(编辑菜单栏第五项)。过去仅可以通过色温工具增添蓝色或黄色调的日子一去不复返了。你可以在色彩选择器中选择任意一种色彩,甚至赋予高光和阴影部分不同的色彩,就是我们常说的色调分离。将饱和度和色调工具搭配使用也非常的棒,传统的色调分离一般使高光部分偏黄,阴影部分偏蓝。
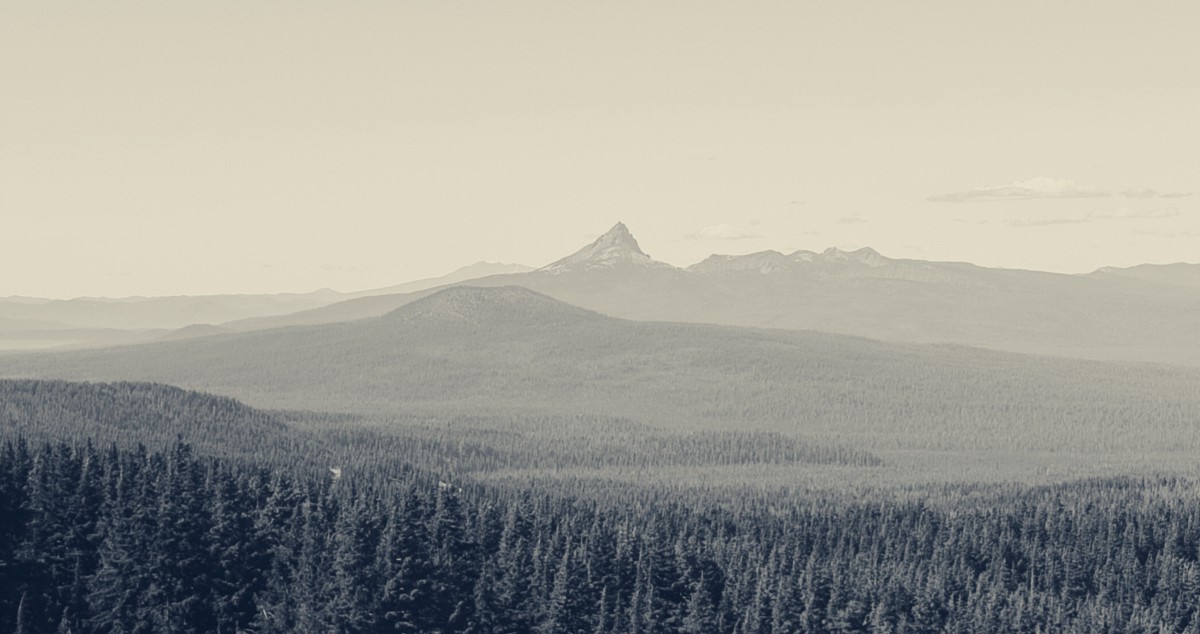
You can also use the same orange tone for both highlights and shadows for a sepia look, or you can add a pink hue to your shadows for a sunburnt look.
你也可以通过选择橙色同时用于高光和阴影部分得到棕褐色的效果。或者将粉红色用于阴影部分得到太阳晒伤的效果。
To get the ultimate control over the color of your photos however, switch over to the Curves Tool.
将曲线工具合理的运用到整个后期的编辑过程中,你将得到色彩的最终控制权。
曲线工具
For the ultimate control over the exact tone in your photo in various tones, Curves is your faithful servant. Again, almost all of the details described in the two-part series on Using Curves applies here. The only real difference is that because the colors have been removed, and because the RGB curve can be used to quickly adjust the brightness and contrast, the adjustments in the various color curves become much more subtle since they’re affecting the tone in a very obvious way.You can recreate the same split tone style using Curves, but doing so requires a lot more work. If you want to play around with it, try making the curve of each color channel shallower or steeper (but still a straight line), and play around with the angles to get the tone you want.
使用曲线工具,可以使得照片的色彩随心而变。我们在之前关于曲线的 两篇文章 中对曲线工具的相关介绍(第一篇|第二篇)拿到在这里都是适用的。唯一的区别在于这里是黑白照片,不过 RGB 曲线依旧可以用于快速的调整照片的亮度和对比度。使用曲线工具来完成一系列的操作,最终实现的效果是令人感动的。你也可以使用曲线工具来实现上面所提到的色调分离效果,只是这样的操作显得比较麻烦。如果你真的想试一试,或许将每条曲线拖动成较为夸张的直线容易实现,通过改变曲线的角度来得到你想要的色调。
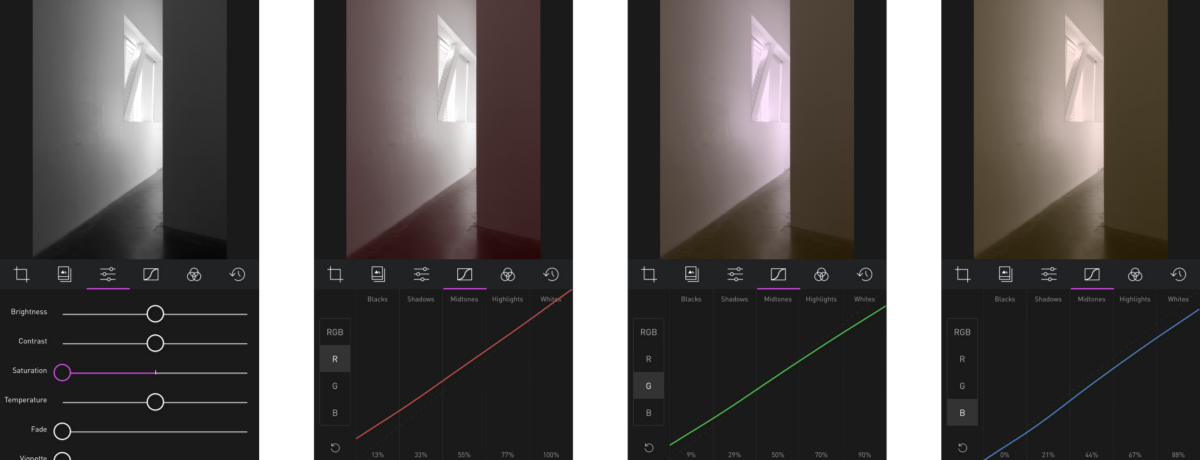
附言
We spent a lot of time thinking about whether Curves should come before or after Saturation. If Curves was applied before saturation, then by desaturating the photo, you end up with a grayscale photo regardless of what Curves was doing to the photo. On the other hand, you get the ability to really control how the Color-to-Grayscale conversion happens. If Curves comes after Saturation (As it does in Darkroom), then making adjustments to the Red, Green, and Blue curves will introduce tone to the photo. We ultimately decided that the ability to take advantage of Curves-Before-Saturation was too advanced to appeal to a wide segment of the Darkroom population, and that adding tone to a Black and White photo is common enough to win-out.
我们花费了大量的时间来思考曲线工具和饱和度运用(应用内摆放)的顺序问题。如果将曲线用于饱和度之前,当照片通过饱和度去色之后,将全部变为灰色,之前曲线的效果就会被淡化。如果将曲线放在饱和度之后(Darkroom 目前就是这样的),你会先得到一张去色后的照片。之后,曲线可以被用来使照片呈现偏红,绿,蓝色调。我相信这样的效果和摆放顺序是被大多数人肯定的。
关联阅读: